
In the previous post we explained how to install a TeamCity server on a Windows Azure Virtual Machine. We used an external SQL Azure database for the internal database used by Teamcity. The first post ended with a functional TeamCity web app that could not be visible from outside. The objective of this second post is to show how to secure the web app by serving up the pages with SSL. Similarly as the previous post I will detailed out all the procedure from scratch so this tutorial will be accessible to an IIS beginner. Indeed, we are going to use a reverse proxy technique on IIS (Internet Information Service, the Microsoft web server). I would like to thank my friend Gabriel Boya who suggested me the reverse proxy trick. Let us remark that it could also be a good solution for serving under SSL any other non IIS website running on windows.
If you have followed the steps of the previous post, then you should have a TeamCity server that is served on port 8080. You should be able to view it with the IE browser under the remote desktop VM at localhost:8080. Let us start this post by answering the following question:
What is a reverse proxy and why use it?
If you try to enable SSL with Tomcat server who serves TeamCity, you are going to suffer for not a very good result. See for instance this tutorial and all the questions it brought. Even if you manage to import your certificate on the java certificate store, you will have problem with WebSockets…
So I suggest you to implement a reverse proxy. The name sounds complicated but it is very basic concept: this is simply another website that will act as an intermediate for communicating to your first and primary website (in our case the Tomcat server). Here, we are going to create an empty IIS website, visible from outside on port 80 and 443. It will redirect the incoming request to our TeamCity server which is listening on port 8080.

Install IIS and the required components
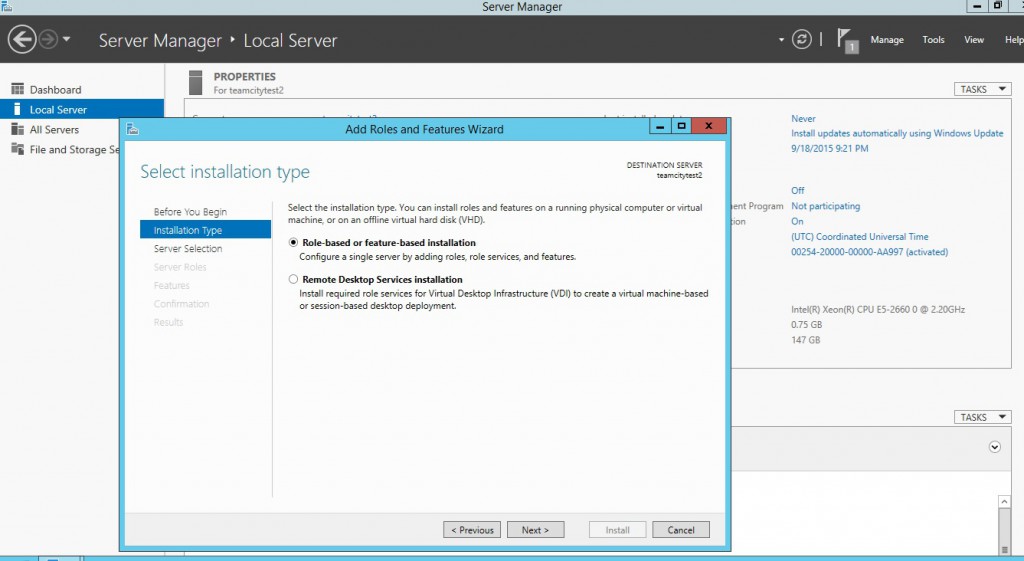
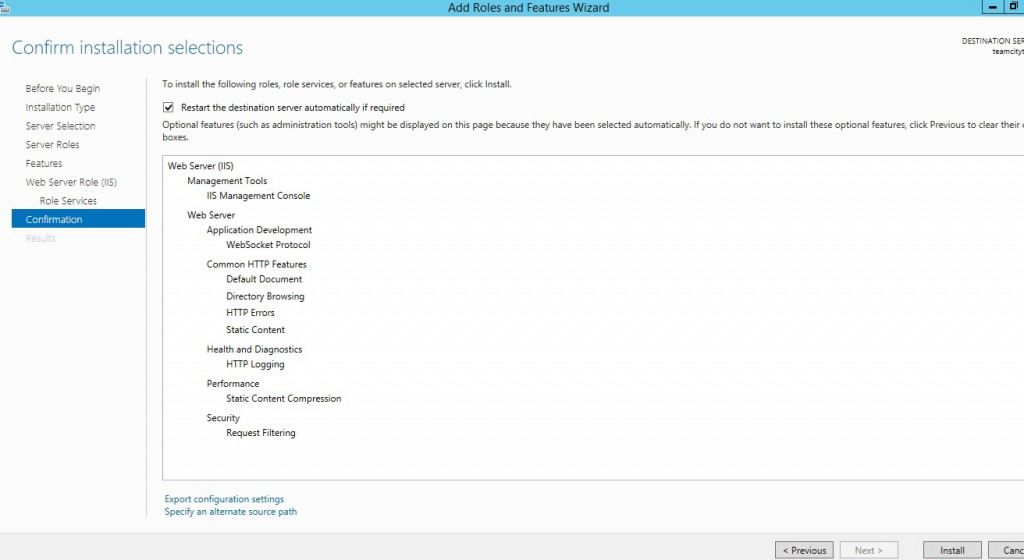
First we will have to install and setup IIS with the following features on our Windows server 2012. It is a very easy thing to do. Search the ServerManager in windows then, choose to configure this Local Server (this Virtual Machine) with a Role-based installation.
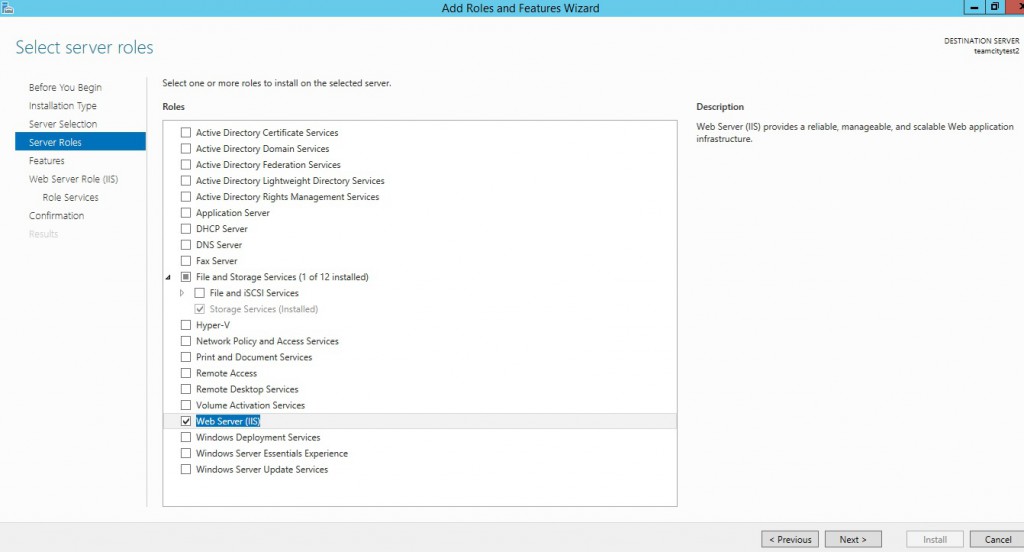
Then, check the “Web Server (IIS)” as a role to install.
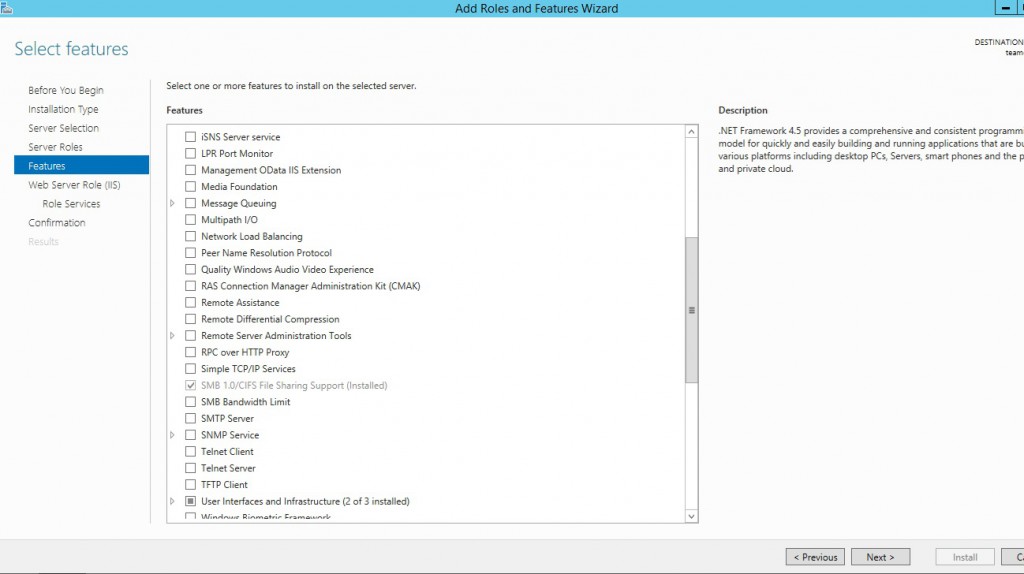
Keep the default feaures.
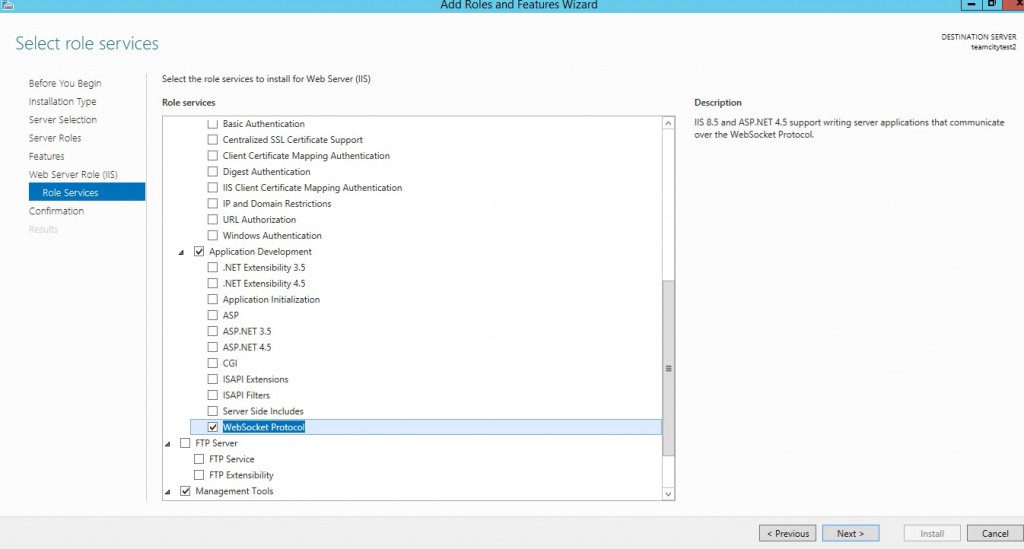
In this recent version, TeamCity uses the WebSockets. To make them work, our reverse proxy server will need them: check WebSocket Protocol.
Check that everything is right there… and press Install.
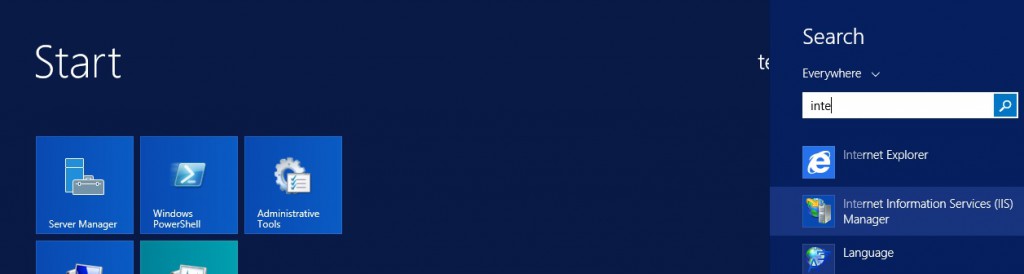
Now that we have installed IIS with our required features (WebSocket),it is accessible from the menu. I suggest you pin that to the easy launch if you do not want to search it each time you will need it.
Install URL rewrite module
The most simple way to set up the reverse proxy is to have the IIS URL rewrite module installed. Any Microsoft web modules should be installed using the Microsoft Web platform Installer. If you do not have it yet, install it from there.
Then, in the Web Platform Installer look for the URL Rewrite 2.0 and install it.

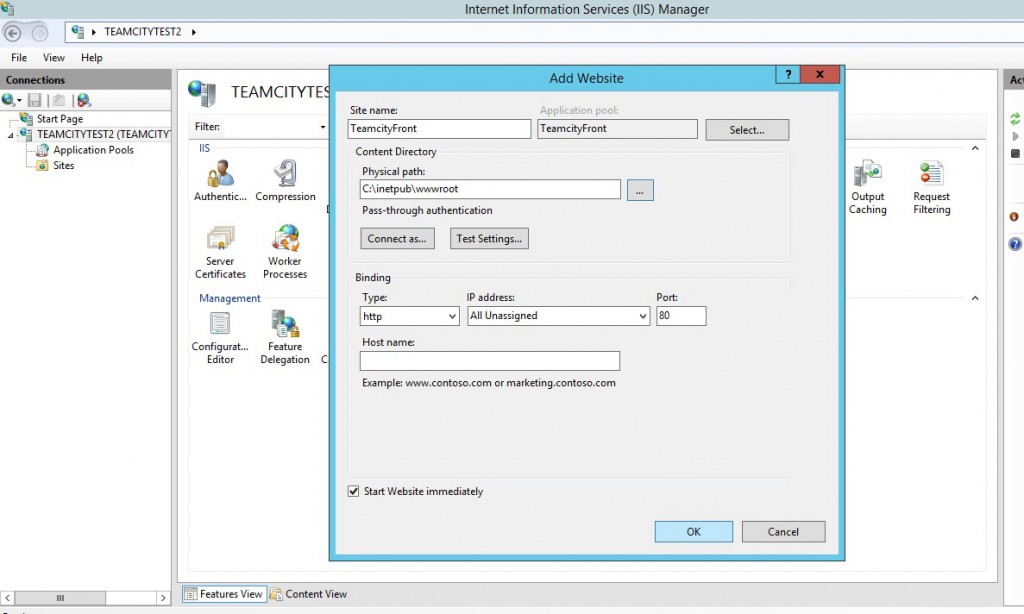
The Reverse proxy website
Ok now we are going to create our proxy website. IIS has gently created a website and its associated pool. Delete them both without any mercy and create a new one (called TeamcityFrom) with the following parameters. Remark: that there is no website and nothing under the C:inetpubwwwroot this is just the default IIS website directory.
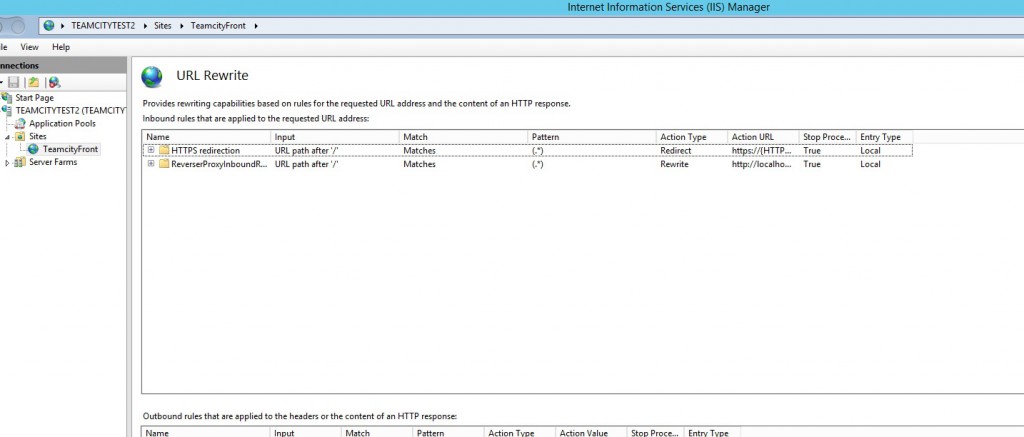
Create the rewrite rule
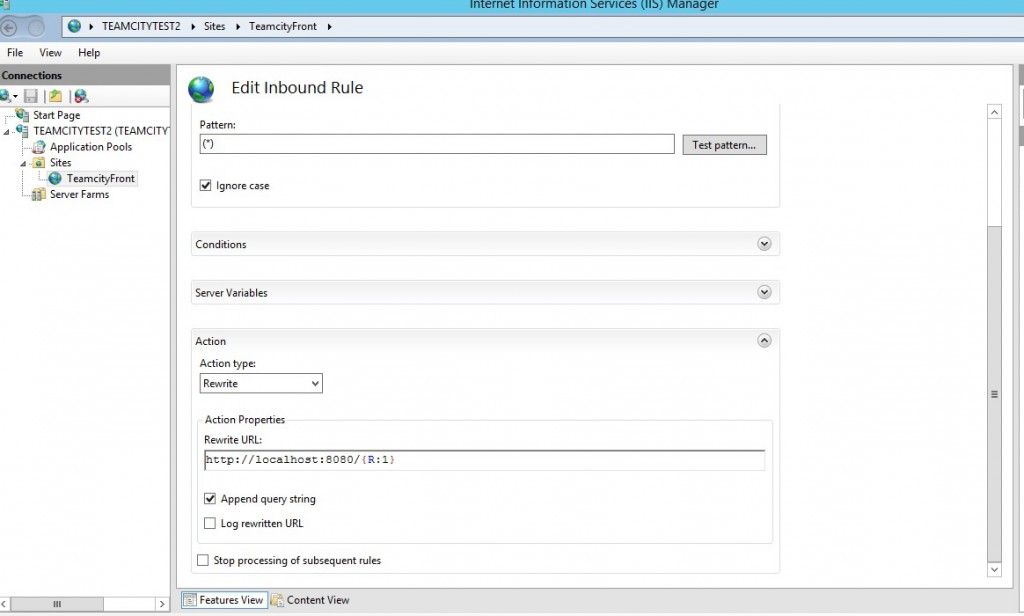
We are going to create a rule that basically transform all incoming http request to request targeting locally localhost:8080. Open the URL rewrite menu that should be visible in the window when you click on your site and create a blank rule with the following parameters.

Now let us go back to the management Azure portal and add two new endpoints http for port 80 and https for 443 in Windows Azure
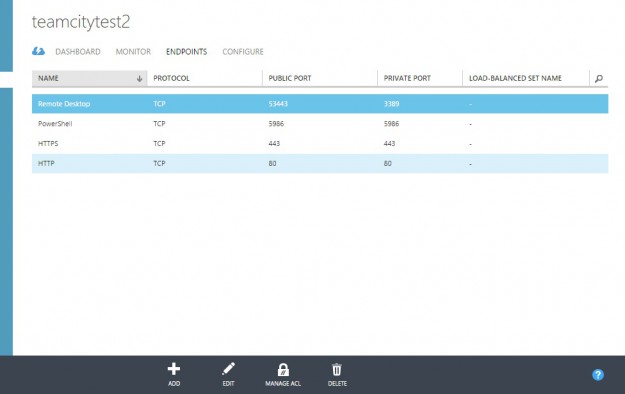
Now check that you are able to browse your site at testteamcity.cloudapp.net from the outside. But you could object what was the point? Indeed, we could have setup TeamCity on port 80 and add the HTTP endpoint on Azure and the result would be the same. Yes you would be right, but remember, our goal is to serve securely with SSL!
Enabling SSL
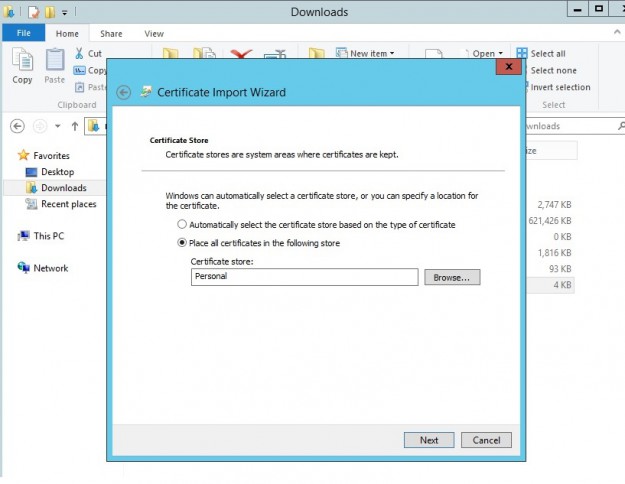
To enable SSL you need to have a certificate, you can buy one at Gandi.net for example. When you get the .pfx file install it on your VM by double clicking and put the certificate on the personal store.
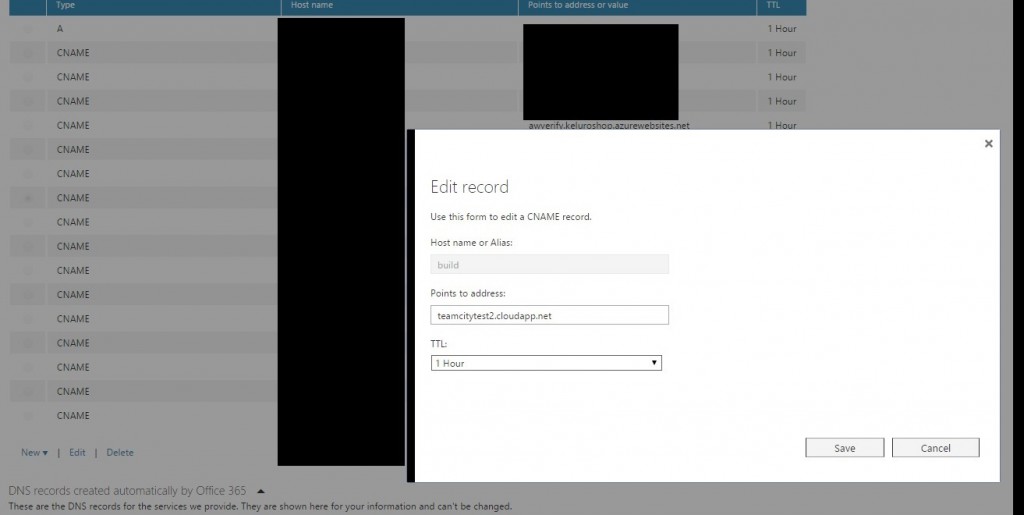
An SSL certificate is bound to a domain and you do not own cloudapp.net so you cannot use the subdomain testteamcity.cloudapp.net of your VM. You will have to create an alias for example build.keluro.com and create a CNAME that will redirect to the VM.
Here is the procedure if you manage your domains in Office365.
Now in IIS, click on your site and edit SSL bindings, add this newly created subdomain build.keluro.com and use the SSL certificate that should be recognized automatically by IIS.
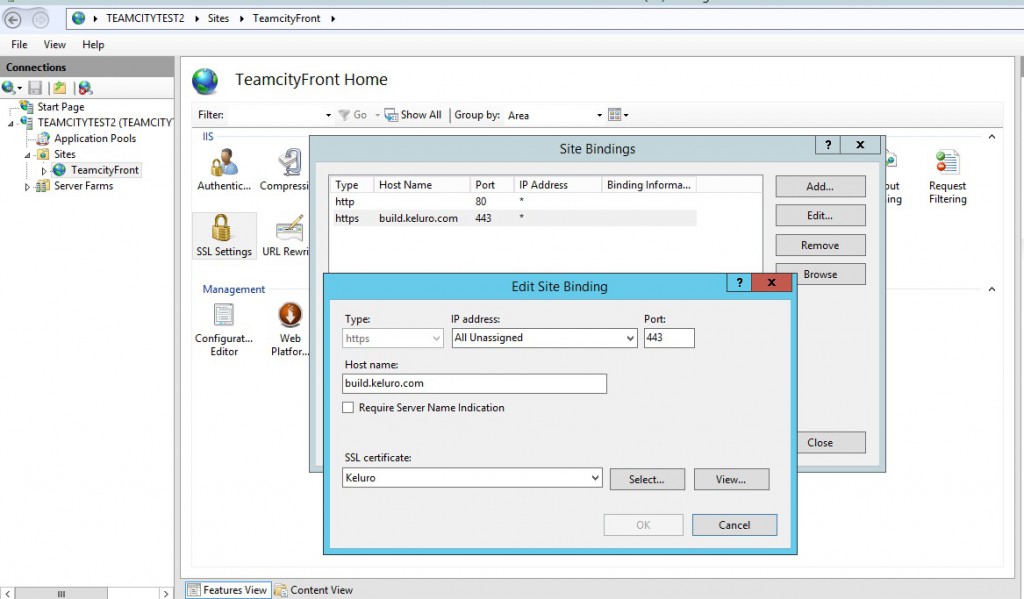
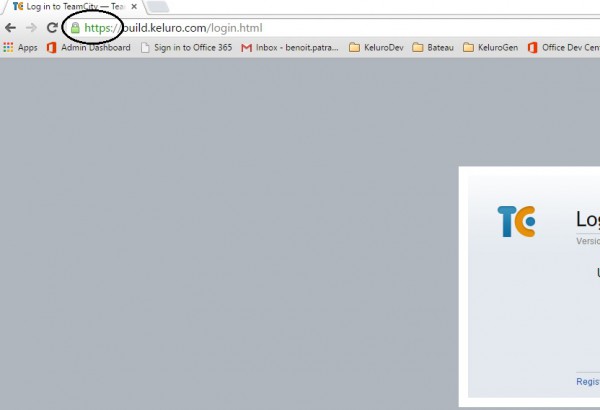
At this stage, you should be able to browse your site on https from the outside with a clean green lock sign.
Redirection Http to Https
You do not want your user to continue accessing insecurely your web app with basic Http. So a good mandatory practice is to redirect your http traffic to a secure https endpoint. Once again, we will benefit from the reverse proxy on IIS. Simply create a new URL rewrite rule.
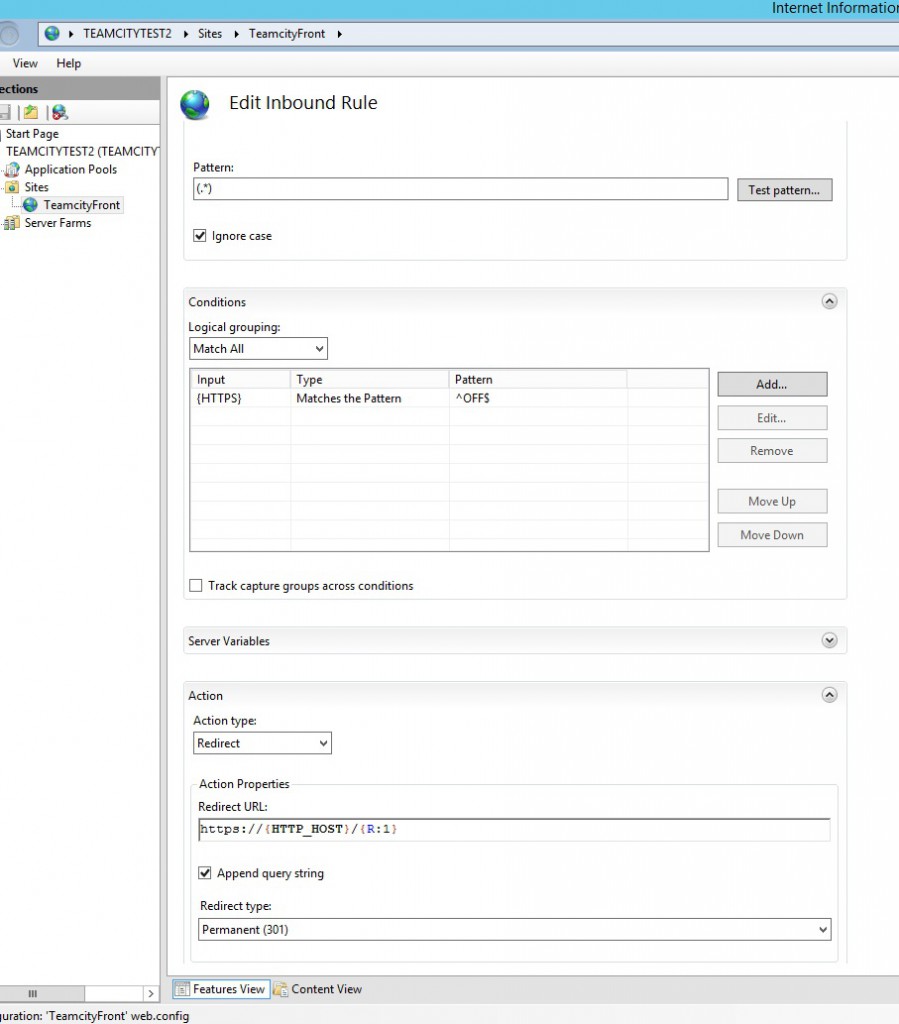
Then place you HTTPS redirection rule before the ReverseProxy rule.
Then know when you type http://build.keluro.com or simply build.keluro.com you’ll be automatically redirected and the job is done!
Comments